1
\$\begingroup\$

In my circuits lab classes, I might sometimes be working on two breadboards at once. I'll stick a breadboard or two in a plastic bag inside of a messenger bag to carry with me.

Short leg components will often fall out because they weren't really deep in the breadboard to begin with. One time we were given some very short leg potentiometers in our kit for a lab and this happened.

Long legs can also be problematic for obvious reasons when a breadboard is put in a bag. Also one time we were only given one certain inductor to be used for several labs- I was very hesitant to snip the legs.

What are your tips for carrying around a bunch of breadboards in bags and keep the elements in place? One idea I had was taping the potentially loose components but that is a bit of a hassle and when you remove the tape you could accidentally dislodge some elements

"well just hold the circuits upright" Sometimes it rains, sometimes you need to ride your bicycle. So say sometimes you need to put the breadboards in a bag sideways. Know anyone who might have some tips?

\$\endgroup\$
5
  • \$\begingroup\$ This is always a little sketchy, because if your circuits are just waiting for an opportunity to fall out, they're just waiting for an opportunity to go intermittent and waste a bunch of your time. I appreciate that you're limited in choice by your student status, but being careful about your build will save you hours. Maybe you can tack on jumper wires to some of the parts? \$\endgroup\$
    – Daniel
    Commented Dec 22, 2015 at 20:08
  • 1
    \$\begingroup\$ My fellow EE students and I all carried toolboxes around campus. \$\endgroup\$
    – Adam
    Commented Dec 22, 2015 at 20:09
  • 1
    \$\begingroup\$ Also, I would get a hard case to put them in, the kind of divider box you put craft and fishing supplies in. Take out the divider and get some pink bubble wrap. \$\endgroup\$
    – Daniel
    Commented Dec 22, 2015 at 20:09
  • \$\begingroup\$ I use this size breadboard amazon.com/RioRand-9440-Breadboard-Prototype-Design-Aid/dp/… but alot of divider boxes look way too small and look like they are for just electrical components. Where can you find a 10 inch by 10 inch by 0.75 inch thick divider box? amazon.com/s/… \$\endgroup\$
    – LongApple
    Commented Dec 24, 2015 at 21:49
  • \$\begingroup\$ @Adam How do I respond to a specific user? I use mainly two 10 by 10 inch breadboards. I'm looking at different toolboxes that dimension. Do you have any tips for stacking two on top of each other? \$\endgroup\$
    – LongApple
    Commented Dec 24, 2015 at 21:54

2 Answers 2

2
\$\begingroup\$

Fun with Cardboard

I keep each of my "fragile" prototype jigs in its own plain cardboard box, similar to the ones you get from Sparkfun or Amazon. (At my job I have plenty of leftover/scrap cardboard shipping boxes for our evaluation kits. Use what you can get locally.) Box should be tall enough to avoid the circuit getting crushed.

You can also mount the breadboard with double-sticky foam tape, on a flat piece of cardboard, trimmed to fit inside the box (maybe 1/4 or 1/2 inch smaller). That will keep it from shaking around inside the box during travel, yet you can still lift the breadboard out and put it on the bench for testing.

I also have used this technique when wiring up two or more printed-circuit board assemblies. A few #4-40 standoffs/nuts/bolts secures each board on the cardboard backing, which provides mechanical strain relief to keep the wires from breaking off.

Antistatic Bag (ESD protection)

I'd recommend keeping the board itself inside an antistatic bag, inside the box. Besides the ESD protection, this helps contain any bits that might get shed off the solderless breadboard if the box takes a tumble. You can buy these bags online, or just collect them as most electronic components get shipped inside these ESD protection bags. (Although most parts nowadays aren't as vulnerable to ESD damage as the old CD4000 CMOS parts were back in the 1970's, the bags are cheap enough and shippers don't want to be blamed if parts arrive dead. So you may already have some of these, if you've bought your breadboarding parts online.) ESD damage can sometimes render a part fully dead, or worse, it can just damage the part a little bit and make the part not work correctly. So it's best to get in the habit of reasonable precaution against possible ESD damage.

Pictures

Assuming you have a cellphone with a camera, it's worth taking a few pictures of the assembled breadboard... digital pictures cost almost nothing, and provide a good reference in case you need to rebuild or repair the circuit (or need to ask advice online).

Taking good, useful reference pictures requires a little bit of practice; try to rest your elbows on the table to avoid shaking the camera, and make sure there's enough diffuse light available (the camera's flash tends to make bright spot reflections that wipe out detail).

\$\endgroup\$
1
\$\begingroup\$

You could buy snap-top food storage bins at the dollar store. Some are probably about the right size.

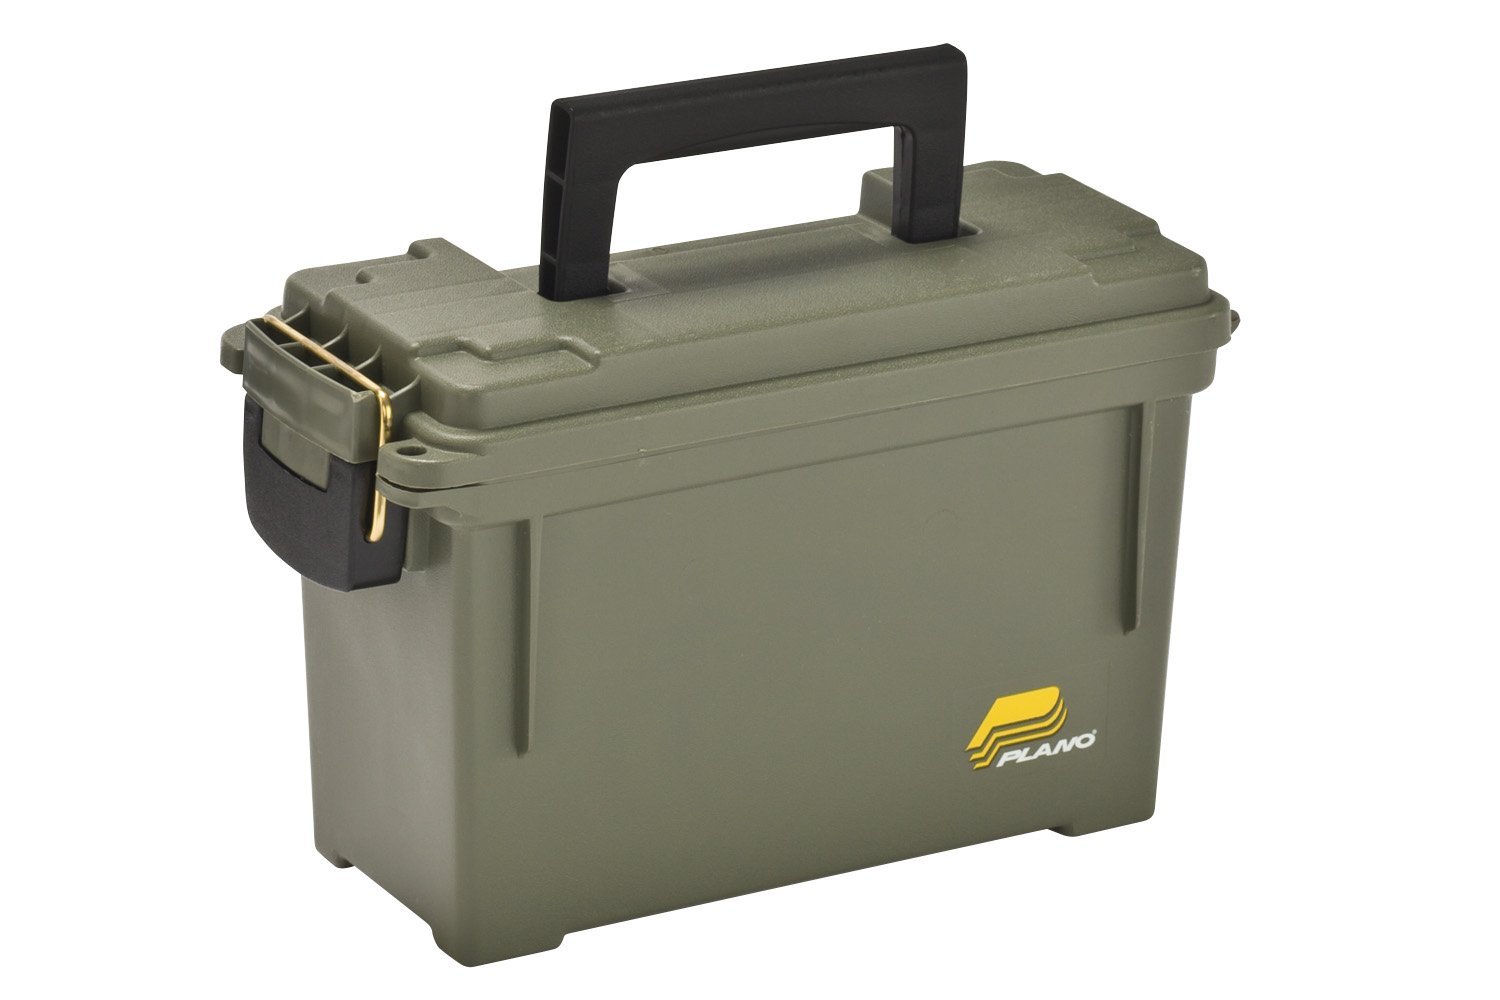
Or if you want to go a little more pro, these inexpensive water-resistant plastic cases are nice, fit into a backpack easily, and can be locked with a padlock:

enter image description here

They're typically used for storing ammo, but they will work fine for this kind of application. I'm not sure a clear case with wires and stuff inside would cause any less distress around a school, but do keep that aspect in mind.

\$\endgroup\$
1

Your Answer

By clicking “Post Your Answer”, you agree to our terms of service and acknowledge you have read our privacy policy.

Not the answer you're looking for? Browse other questions tagged or ask your own question.