3
\$\begingroup\$

There is an Arduino library for the HIH-6130 which has exact same I2C protocol as the sensor I am using which is the HIH-6120. I am using the same two lines of code to tell the sensor to take a reading:

Wire.beginTransmission(0x27);
ret = Wire.endTransmission();

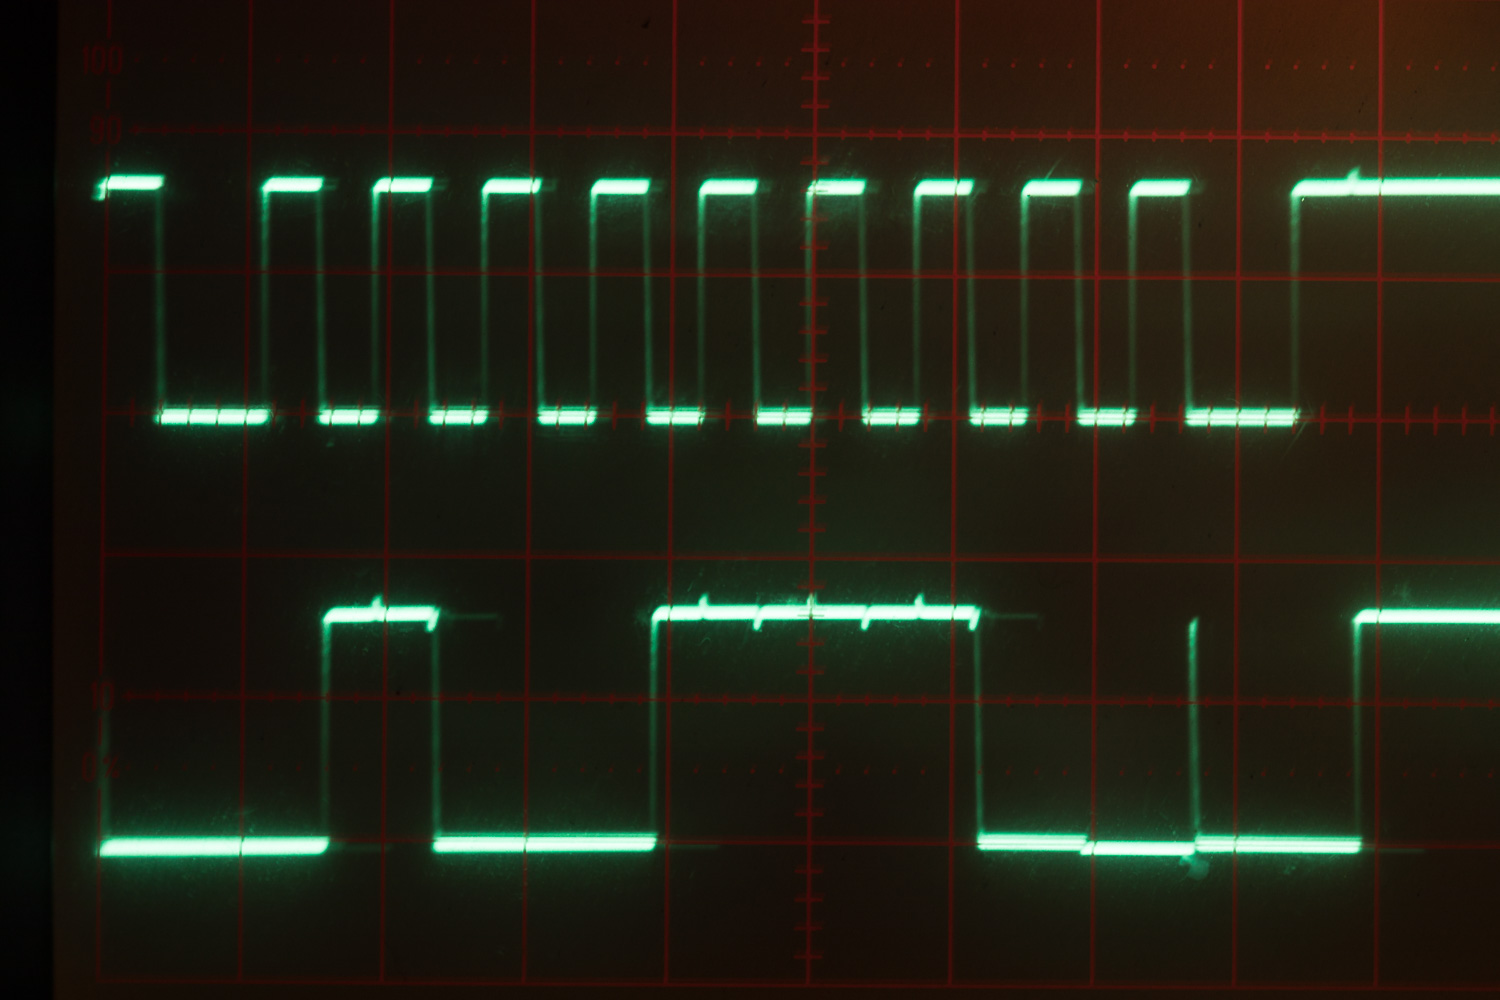
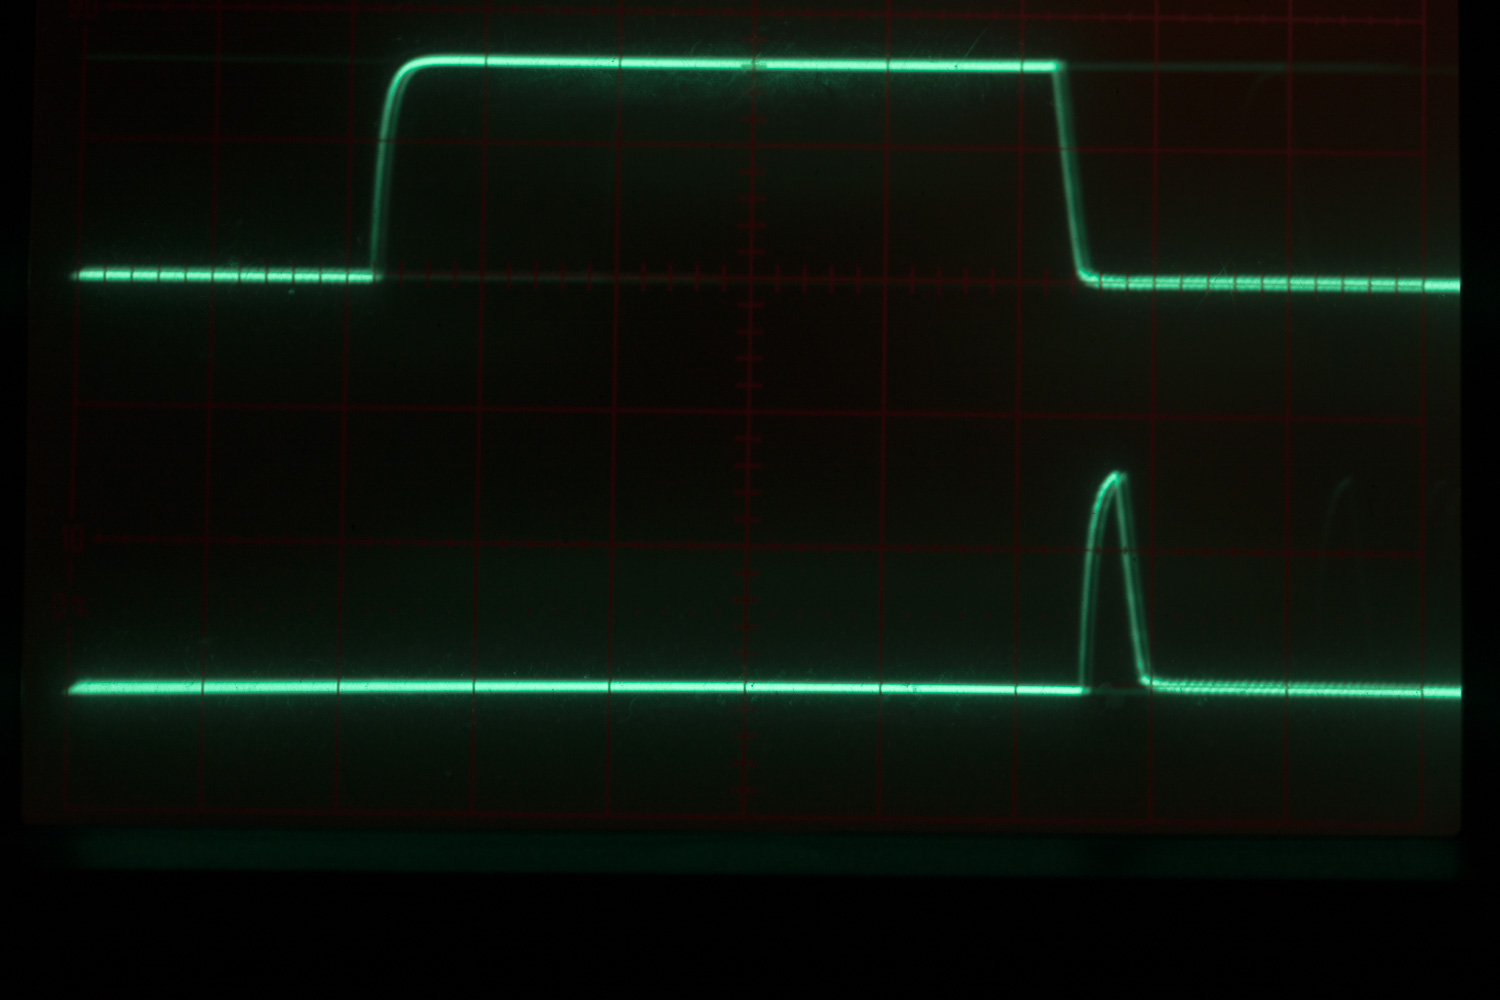
ret is 2, which means master received NACK on transmit of address. Looking at this on my analogue scope it appears the sensor makes an attempt to let SDA rise to 1 but it is late and too weak: thus (about 10us per div, 2v per div, sync on falling SDA) A delayed by B gives thus (1us per div) Pullup resistors are 2k. Sensor address is 0x27 according to HP. Min clock frequency is 100 KHz which is what Arduino is giving.
What on earth is wrong?

\$\endgroup\$
1
  • \$\begingroup\$ Nothing looks wrong at first glance. The address is being transmitted correctly, the 8th bit is low (write) and the 9th bit is low at the rising edge (ACK). The stubby rise/fall is just the time between the slave releasing SDA and the master pulling it down methinks. \$\endgroup\$ Commented Jan 5, 2018 at 22:07

2 Answers 2

2
\$\begingroup\$

It looks like it's ACK'ing fine to me but maybe or the code is interpreting it wrong?

I see the 0x27 (data latched on the rising clock edge), and then the read/write bit is 0 meaning you are doing a write, then the slave drives SDA low to indicate an ACK. You can see right when it happens there's a tiny step down to exactly 0 Volts.

Then on the falling edge of the clock the slave is releasing the SDA line (as it should) so the SDA rises up, then the master is taking over the bus and driving SDA line low. That's why you see that narrow blip.

So it looks fine. Somehow the HW is interpreting it wrong or your understanding of the API might be wrong?

\$\endgroup\$
1
  • \$\begingroup\$ Thanks. When I posted I had in my mind that slave had to drive SDA to 1 to ACK but of course it has to pull it down, so I misinterpreted. But Arduino still returned 2 indicating it was reading a NACK. See also my comment on Lawrence above. \$\endgroup\$ Commented Jan 6, 2018 at 10:03
2
\$\begingroup\$

See my comment above - the transaction itself looks OK.

However, all your code is doing is sending the address then immediately sending a STOP. You're not actually reading anything. This first read is a just a dummy wake-up command (thanks Janka).

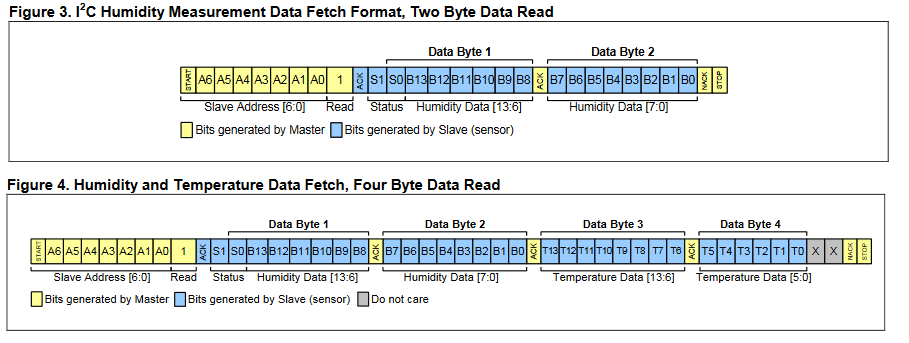
According to the datasheet, you then need to send the address in READ mode then read either two bytes if you want just humidity, or four bytes if you want humidity plus temperature. Then you send a stop.

enter image description here

I think the code needs to look more like this:

Wire.beginTransmission(0x27); // write to wake-up
Wire.endTransmission();       // ignore this
delay(100);

Wire.begin();                 // optional for read
Wire.requestFrom(0x27, 4);    // request 4 bytes from slave device 
while (Wire.available())      // slave may send less than requested
{                            
    char c = Wire.read();     // receive a byte as character
    Serial.print(c);          // print the character
}
ret = Wire.endTransmission();

If this code messes up (i.e. if it still sees NAK where there is none), there's something fishy with the library perhaps.

\$\endgroup\$
4
  • 1
    \$\begingroup\$ You had to send the address in write mode first to trigger a conversion. Then wait. Then read. \$\endgroup\$
    – Janka
    Commented Jan 5, 2018 at 22:16
  • \$\begingroup\$ Duh - thanks. Missed that. Perhaps the Arduino library doesn't like start-stop no-data transactions? \$\endgroup\$ Commented Jan 5, 2018 at 22:25
  • \$\begingroup\$ Thanks. I simplified my code down to the initial NACK. I actually did have code as you suggest but Wire.available() always returned 0. This is one of those annoying problems that go away over night. This morning it is working fine and I swear I've done nothing except plug a USB cable in to power it. One faint possibility is that the sensor comes with a cover over the sensing hole, and I had left that in place. Last night I took it off, but it didn't immediately make any difference. Might it be that the sensor needs time to sit in ambient before going into full working mode first time? \$\endgroup\$ Commented Jan 6, 2018 at 10:09
  • \$\begingroup\$ Ah, no. Dicky connection in my breadboard on the SDA line. Sorry to waste your time. \$\endgroup\$ Commented Jan 6, 2018 at 10:31

Your Answer

By clicking “Post Your Answer”, you agree to our terms of service and acknowledge you have read our privacy policy.

Not the answer you're looking for? Browse other questions tagged or ask your own question.