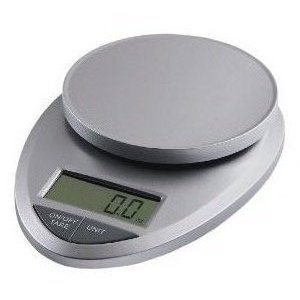
If you want ease of implementation, value for money, and good accuracy - then a cheap commercial digital "kitchen scales" is worth considering. These are commonly available in 2 kg and 5 kg versions and no doubt other ranges as well. By using a simple lever arrangement you can increase or decrease sensitivity mechanically.
You can buy load cells and instrumentation amplifiers and roll your own, but the ones in some kitchen scales are superb and the cost is liable to be far less than you can buy the parts for new.
Note that a load cell beam CAN be damaged by overloading. The gauges usually are designed to "bottom" shortly past full scale. If you used say a 5kg cell and used it to only say 2kg or 3kg and added your own stops so it never reached full scale then you would completely avoid overload damage.
The best (and in some cases also the cheapest) kitchen scales use a "real" load cell with 4 strain gauges in a bridge plus hopefully a 5th temperature compensating strain gauge (places on the load cell where stress/strain is caused only by temperature changes. The photo below shows a typical load cell used in low cost scales.

Performance of cheap kitchen scales varies from not-overly-marvellous through to unbelievably superb.I bought some 2 kg kitchen scales here a few years ago which were essentially linear to 0.1% across the range and which were temperature immune for practical purposes.
Mine looked very like these. Similar appearance no guarantee.

Factors which relate are accuracy, linearity, repeatability and temperature independence. The first 3 are close travelling companions but not identical.
Accuracy checking: Obtain several hundred one and two cent coins. These will probably weigh close to 1.000 gram and 2.000 gram each. If not that then some other fixed mass. This is partially so banks can check amounts by weighing. They are amongst the best value for money calibration wights you can but. Make a few larger test weights by using eg coins to calibrate them. Say 100 200 400 800 gram would be easy. These can be made out of almost anything stable. Even eg plastic screwtop jars with water in - as long as they are airtight.
My scales would track linearly for any number of coins aded or removed and whether removed or added one by one or N at a time. Superb. Some scales are not so good.
Some scales are poorly temperature compensated. Mine can have a hairdrier waved over them on high until they are toasty hot (50C plus) with little of no display deviation. Superb.
Interfacing to Arduino:
Once you have found ones which are accurate enough for you, you need to interface them to the Arduino.
Access to existing amplified signal: Most will have an analog voltage(amplified strain gauge signal) which is converted to digital by the display controller. Signal level should be in the volt or few range - easy for an Arduino ADC to measure.
Access scale controller's digital signals: If you can't get at the analog signal you may be able to access the controller at the digital stage. Long ago people have gone so far as decoding 7 segment multiplexed display signals for processor interface - but if it's that hard then finding ones with analog signal access would beeasier.
Voltage to frequuency ADC: Some may use a V to F (Voltage to frequent) converter. These are easy to read by either pulse counting in finite time or by seeing how long it takes to make N clock cycles. You could also add a V to F converter to existing scales using th amplified strain gauge voltage as input and reading the output frequency with the Arduino - but a "proper" ADC approach is probably preferable.
Instrumentation amplifier + ADC: Failing all the above you can use the classic instrumentation amplifier plus ADC solution. Integrated high performance instrumentation amplifiers make this easy enough, but using what's in the scales already is liable to make more sense.


