As background to hacking an existing LASER rangefinder, here is an extremely good account of one man's Attempt tounderstand and serially interface a Aparkfun Prexiso LASER rangefinder - he failed but gives extremely interesting and probably useful information of what he found.
Sparkfun utrasonic rangwefonder module.
Expensive considering what a LASER tap measure costs.
Variants and basic specifications . 25 foot range claimed. Useful information.
A Doppler RADAR using RF operating at a few hundred MHz - possibly using a Gunn door opener module from days of yore, can have a range of 'very large'. I once owned an APN1 Radio Altimeter from a Bristol Freighter (aircraft) and it managed 1000's of feet with ground as the 'reflector' - lots of ground admittedly - and used acorn tube thermionic valves. You should be able to get as much range as your heart may desire using RF.
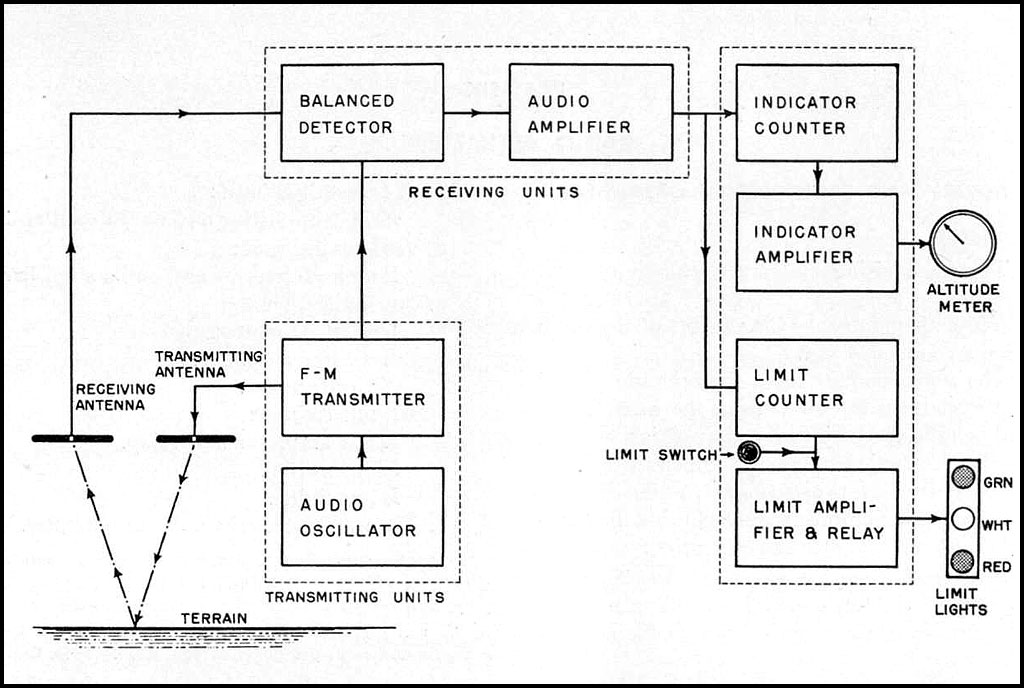
The APN 1 used a simple but useful method to NOT have to measure time of flight explicitly. Time of Flight (TOF) measurement is possible but at short ranges involves VERY short times. A nanosecond is a light-foot time wise!.
The APN1 transmitter was frequency swept and the received reflected signal was mixed with the current transmitted signal. The returning signal wis at the tx freq when the signal left and the tx freq has been swept to some other frequency by the tome the signal returns. The difference frequmcy, obtained buy mixing tx and reflected signal, gives a direct measure of range.
Discussion - while this relates to WW2 RF equipment it is directly applicable to a modern short range version
Basic principle:

Yee Ha!!!

You could use an angle measuring two points on baseline classical rangefinder. This could use a LASER to make two spots which you arrange to coincide under Arduino control. An olde worlde approach, but one which is eminently doable.
If you used a 1 metre baseline and one beam went straight out and the other was moved to conicide and you then measured tha angle of he movable spot.
At 5 metres the angle change for 1 metre increase is 78.7 degrees to 80.6 degrees = + 1.85 degrees
10 to 11 metres, angle change = 0.516 degrees
15 to 16 = 0.238 degrees
20 to 21 = + 0.14 degrees
25 to 26 ~= 0.1 degrees
30 to 31 degrees = +0.06 degrees
You can decide at what range the degrees change is too hard to read accurately.
A longer baseline decreases the position in the table.
eg a 2 metre baseline gives 30/2 =15 degree effective result.
Distance
........Degrees
................. Delta degrees
1... 45.0
2... 63.4... 18.4
5... 78.7 ...2.7
10..84.3 ...0.63
15.. 86.2... 0.27
25.. 87.7... 0.10
30.. 88.1... 0.07
ADDED:
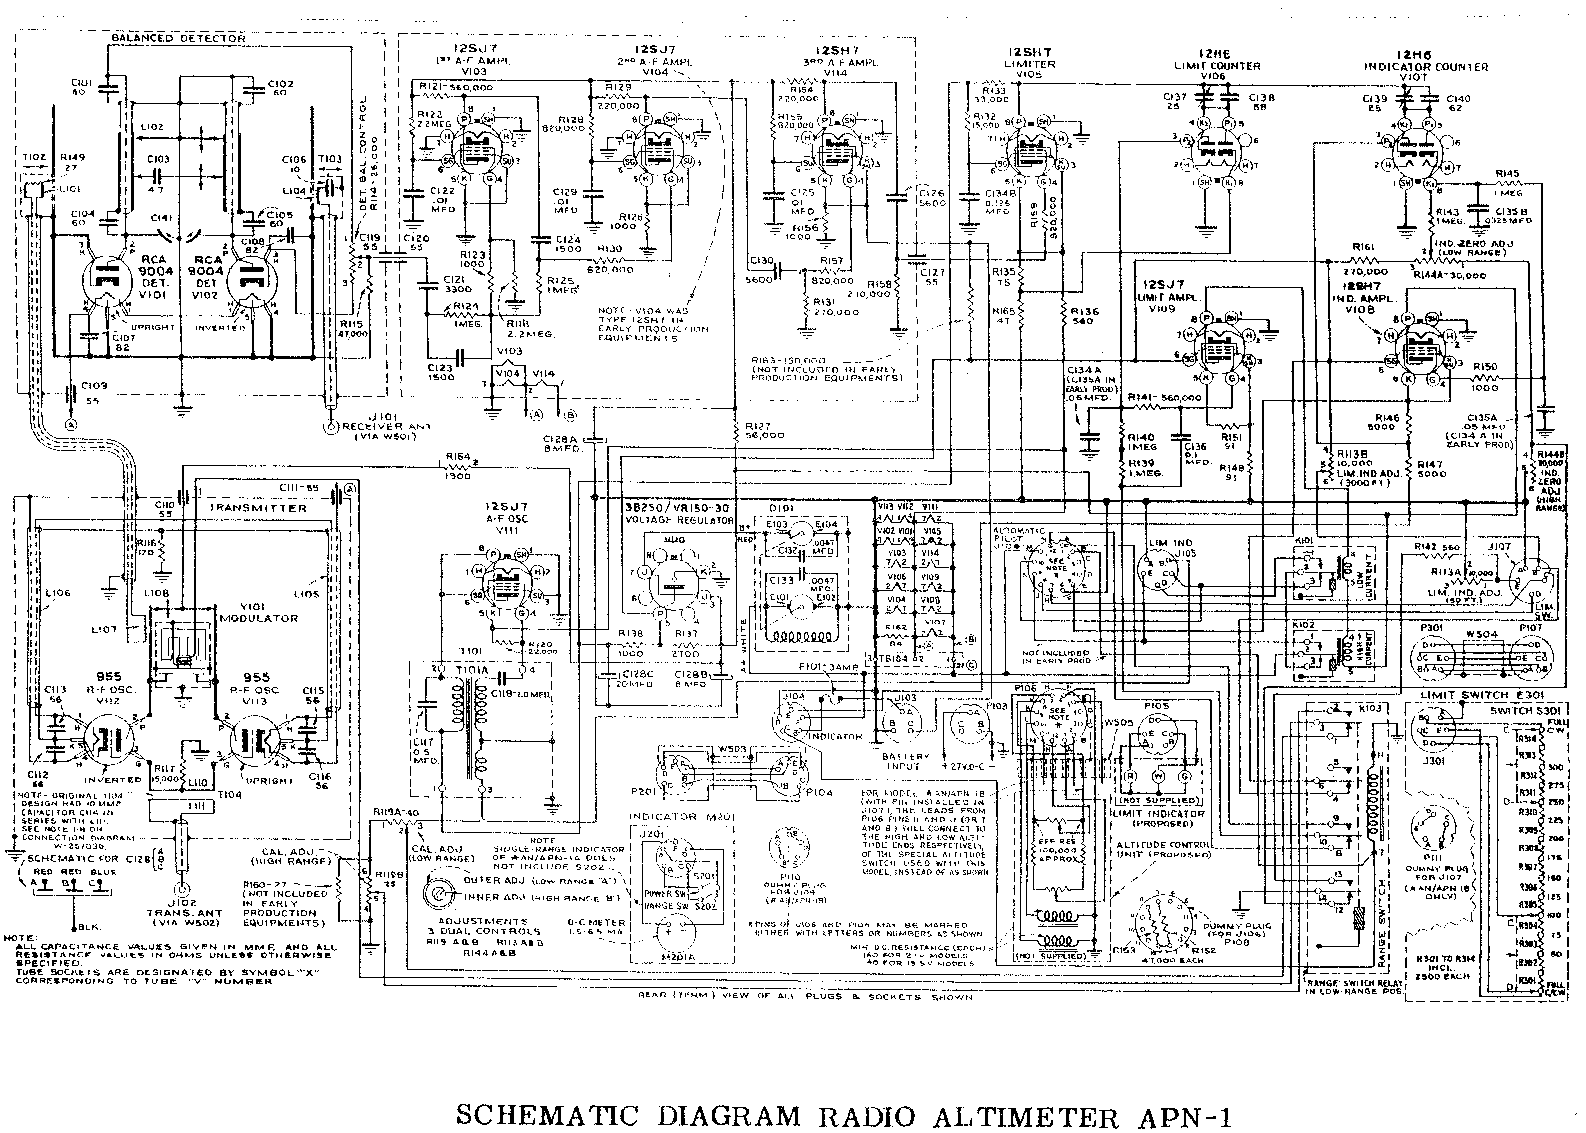
I included the APN1 main circuit diagram as much for fun to show what could be done in 1940 with Acorn tubes BUT in gact it is potentially useful for ideas. The diagram above is readable if you look at it full size as supplied. (Right click and then copy or save or open).This is "as supplied" quality -somebody has scanned the original to a gif in 2 colour "black & white".
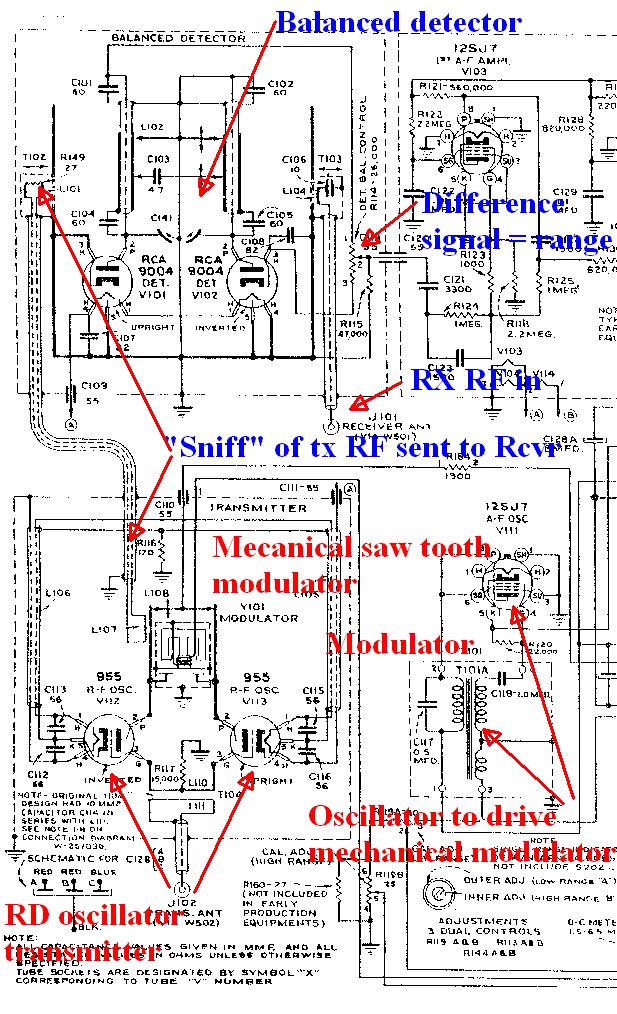
I have copied part of the circuit below and added notes. Something like this could be done with modern components with "relative ease" [tm].
The key special magic is provided by the modulator - here a voice coild driven variable capacitor wihich scans the transmitter across a frequency range. The modern equivalent is a varacror diode - variable capacitance with reverse voltage. The oscillator at right middle drives this modulator.
The transmitter is a pair of push-pull acorn tubes driving the transmit aerial at bottom left. A "sniff" [technical term :-) ] of RF is sent from the TX to the RX at top left. A balanced detector - here a pair of Acorn tubes V101 and V102 bu nowadays a Schottky diode ring mixer or similar take the TX sniff and the received echo and mix them to provide a difference signal at the output at top right. This is then amplified as the range signal. Implementing this with "solid state" parts would result in a simple and possibly even effective result. Transmitter beam width would be a major consideration. A GHZ or so oscillator and a lonnnnnng Pringles can antenna (or two) may be enough. Modern cellphone and WiFi components are so readily available (surplus if needs be) that the "hard" RF aspects could be covered by premade parts.


