When starting out, we all made many mistakes, that is part of the normal process of learning. You have some mistakes, so try not to get too discouraged. Let me point out a couple of issues, in addition to what has already been said.
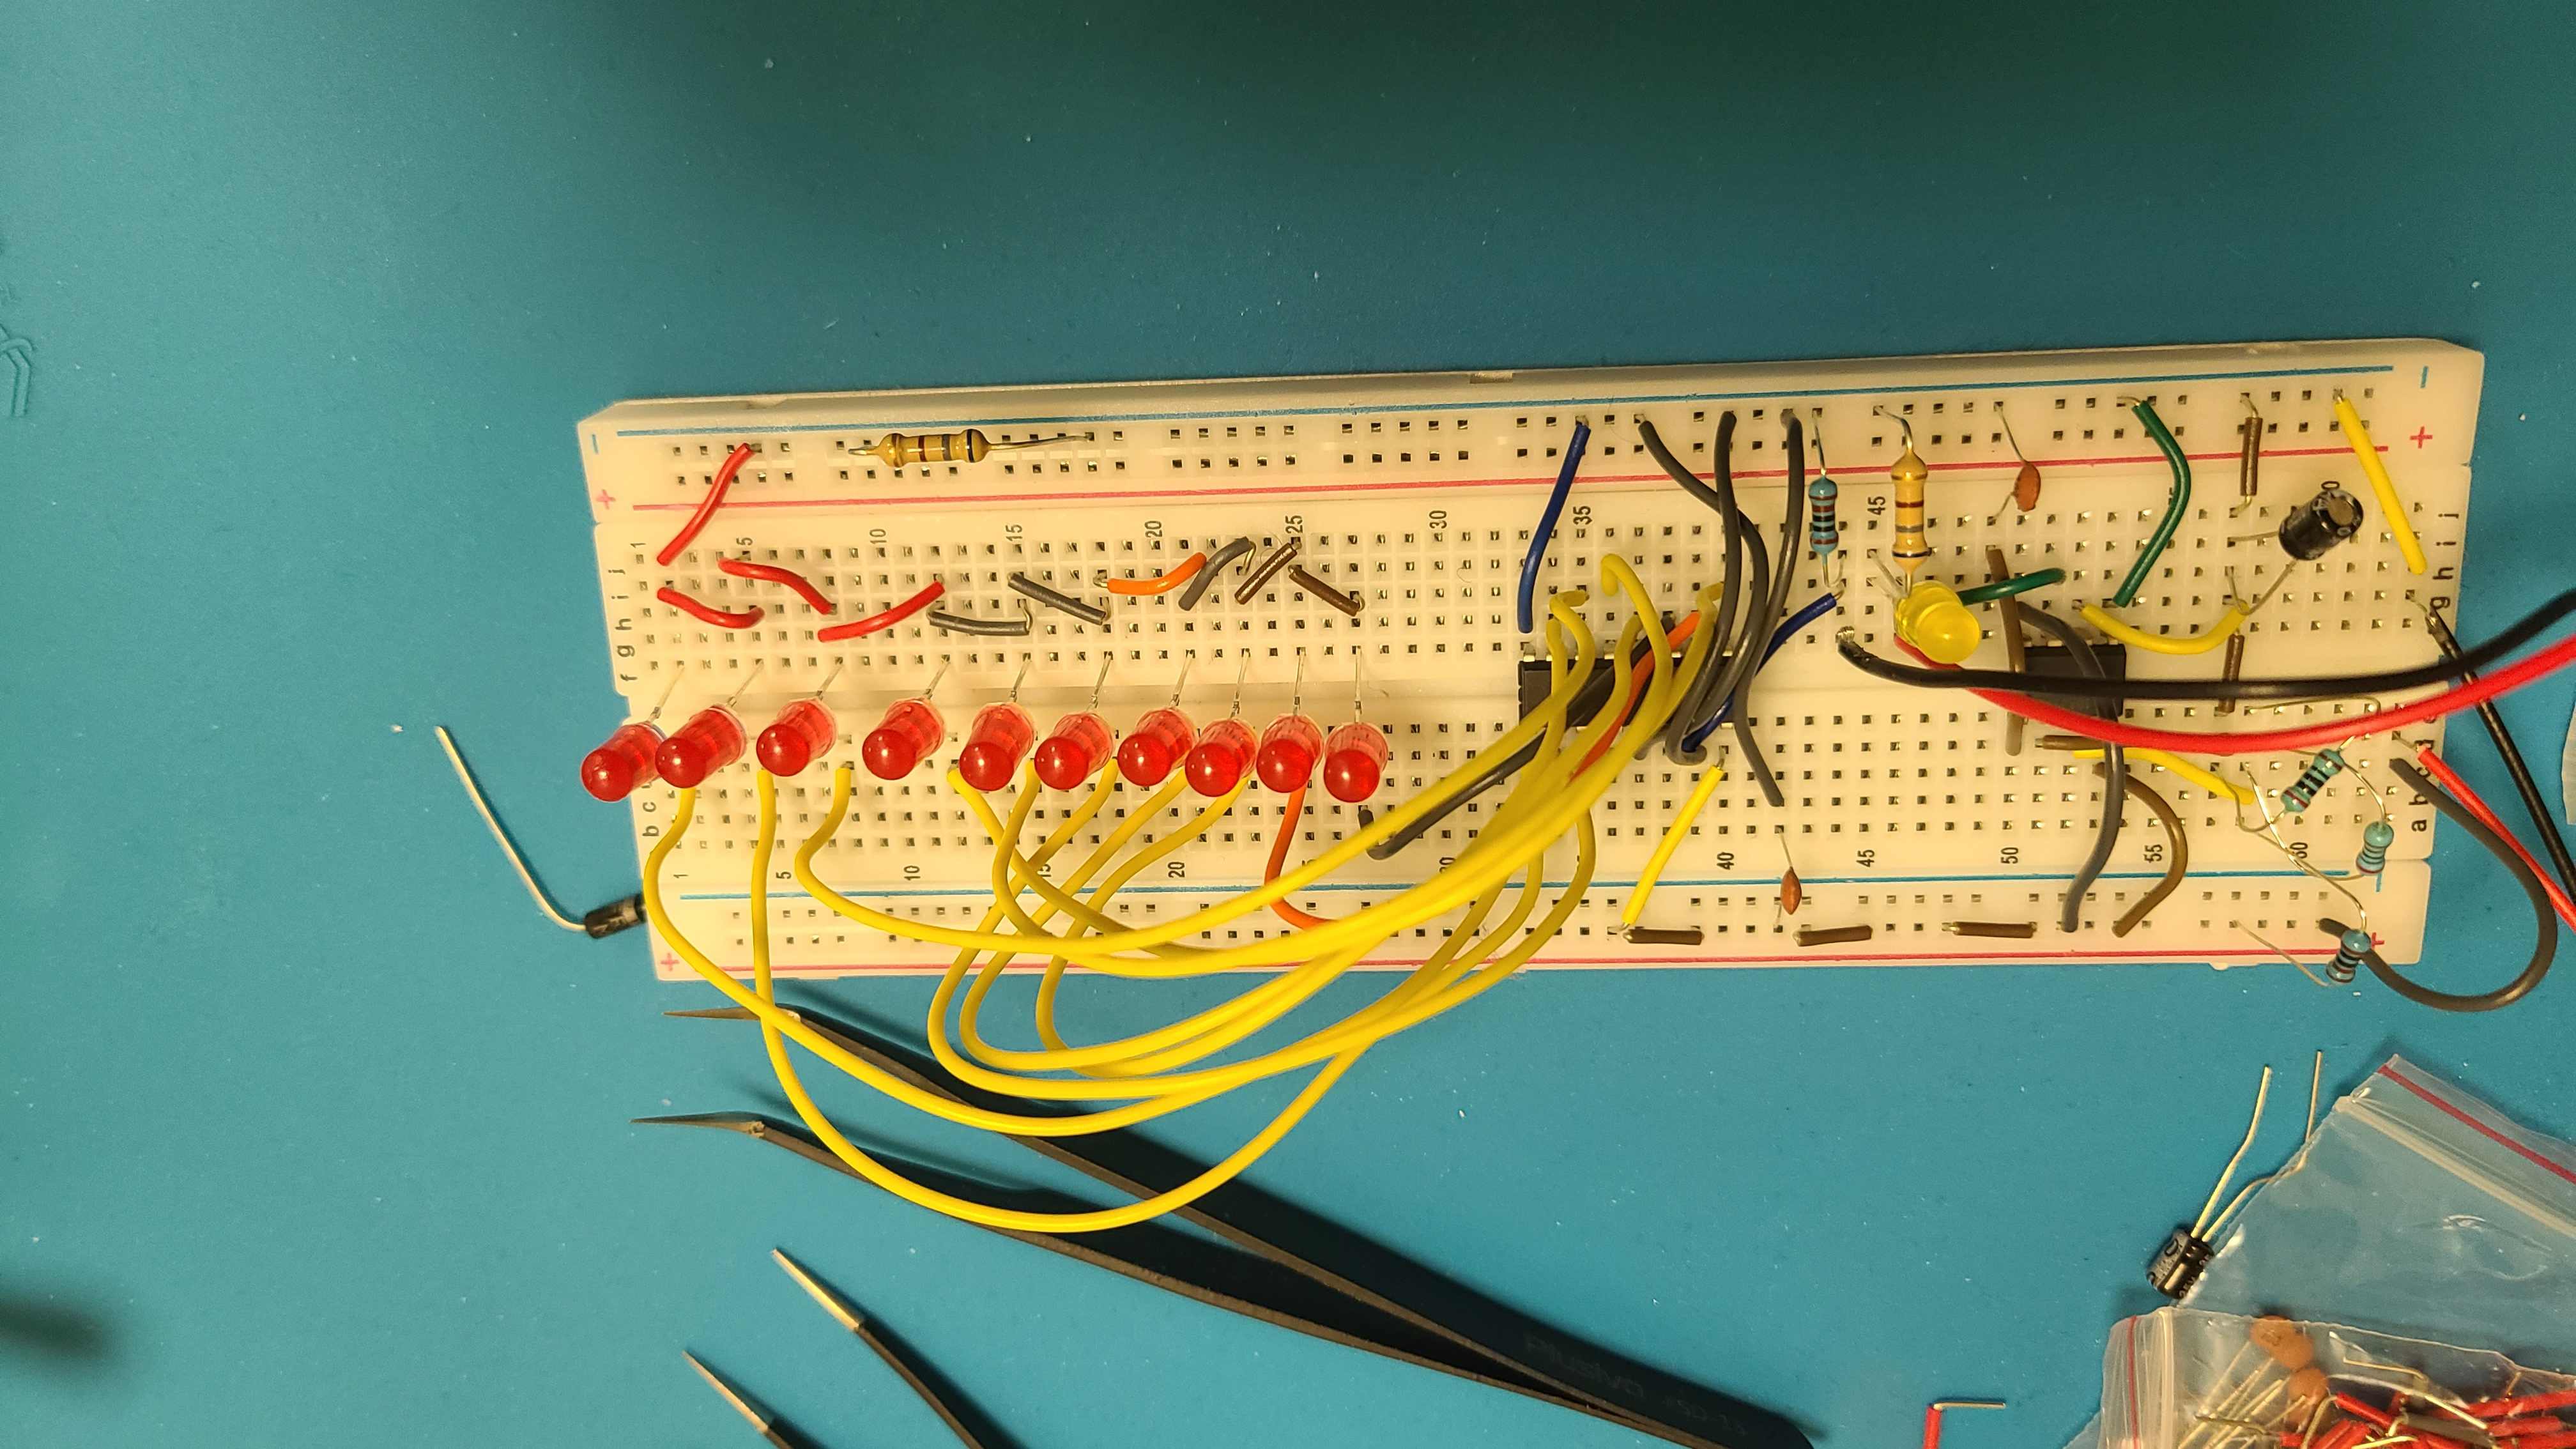
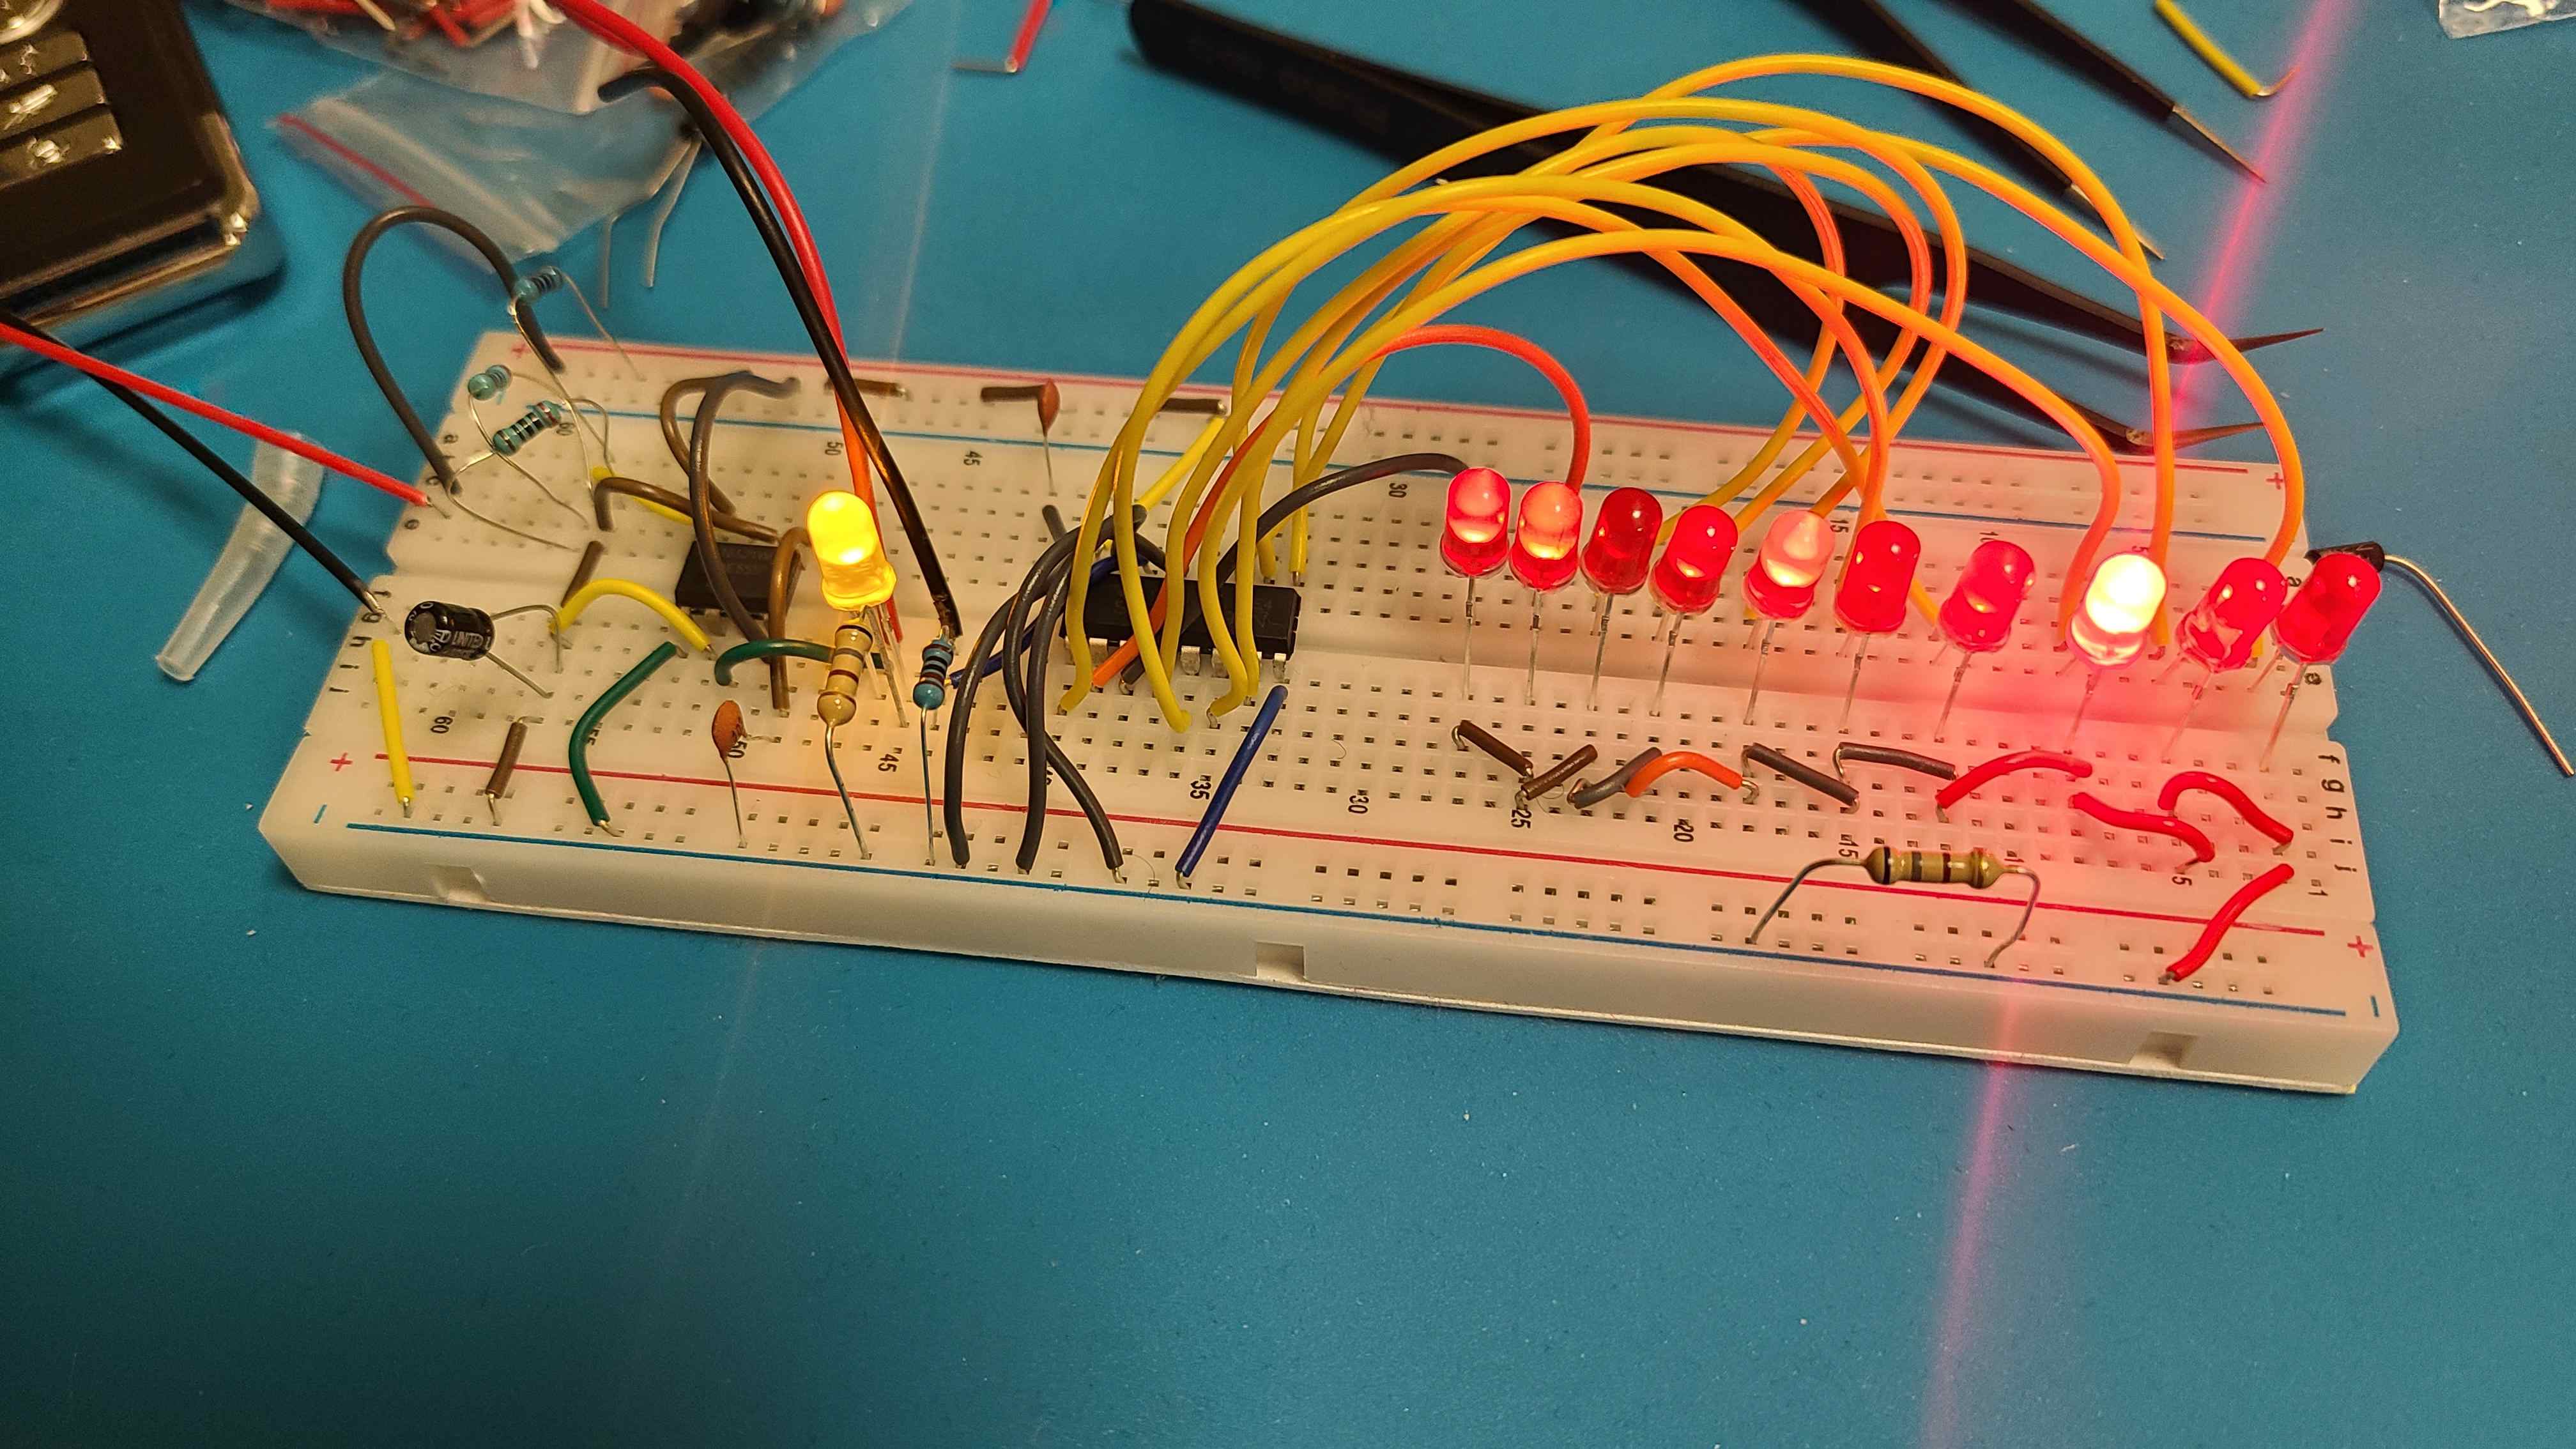
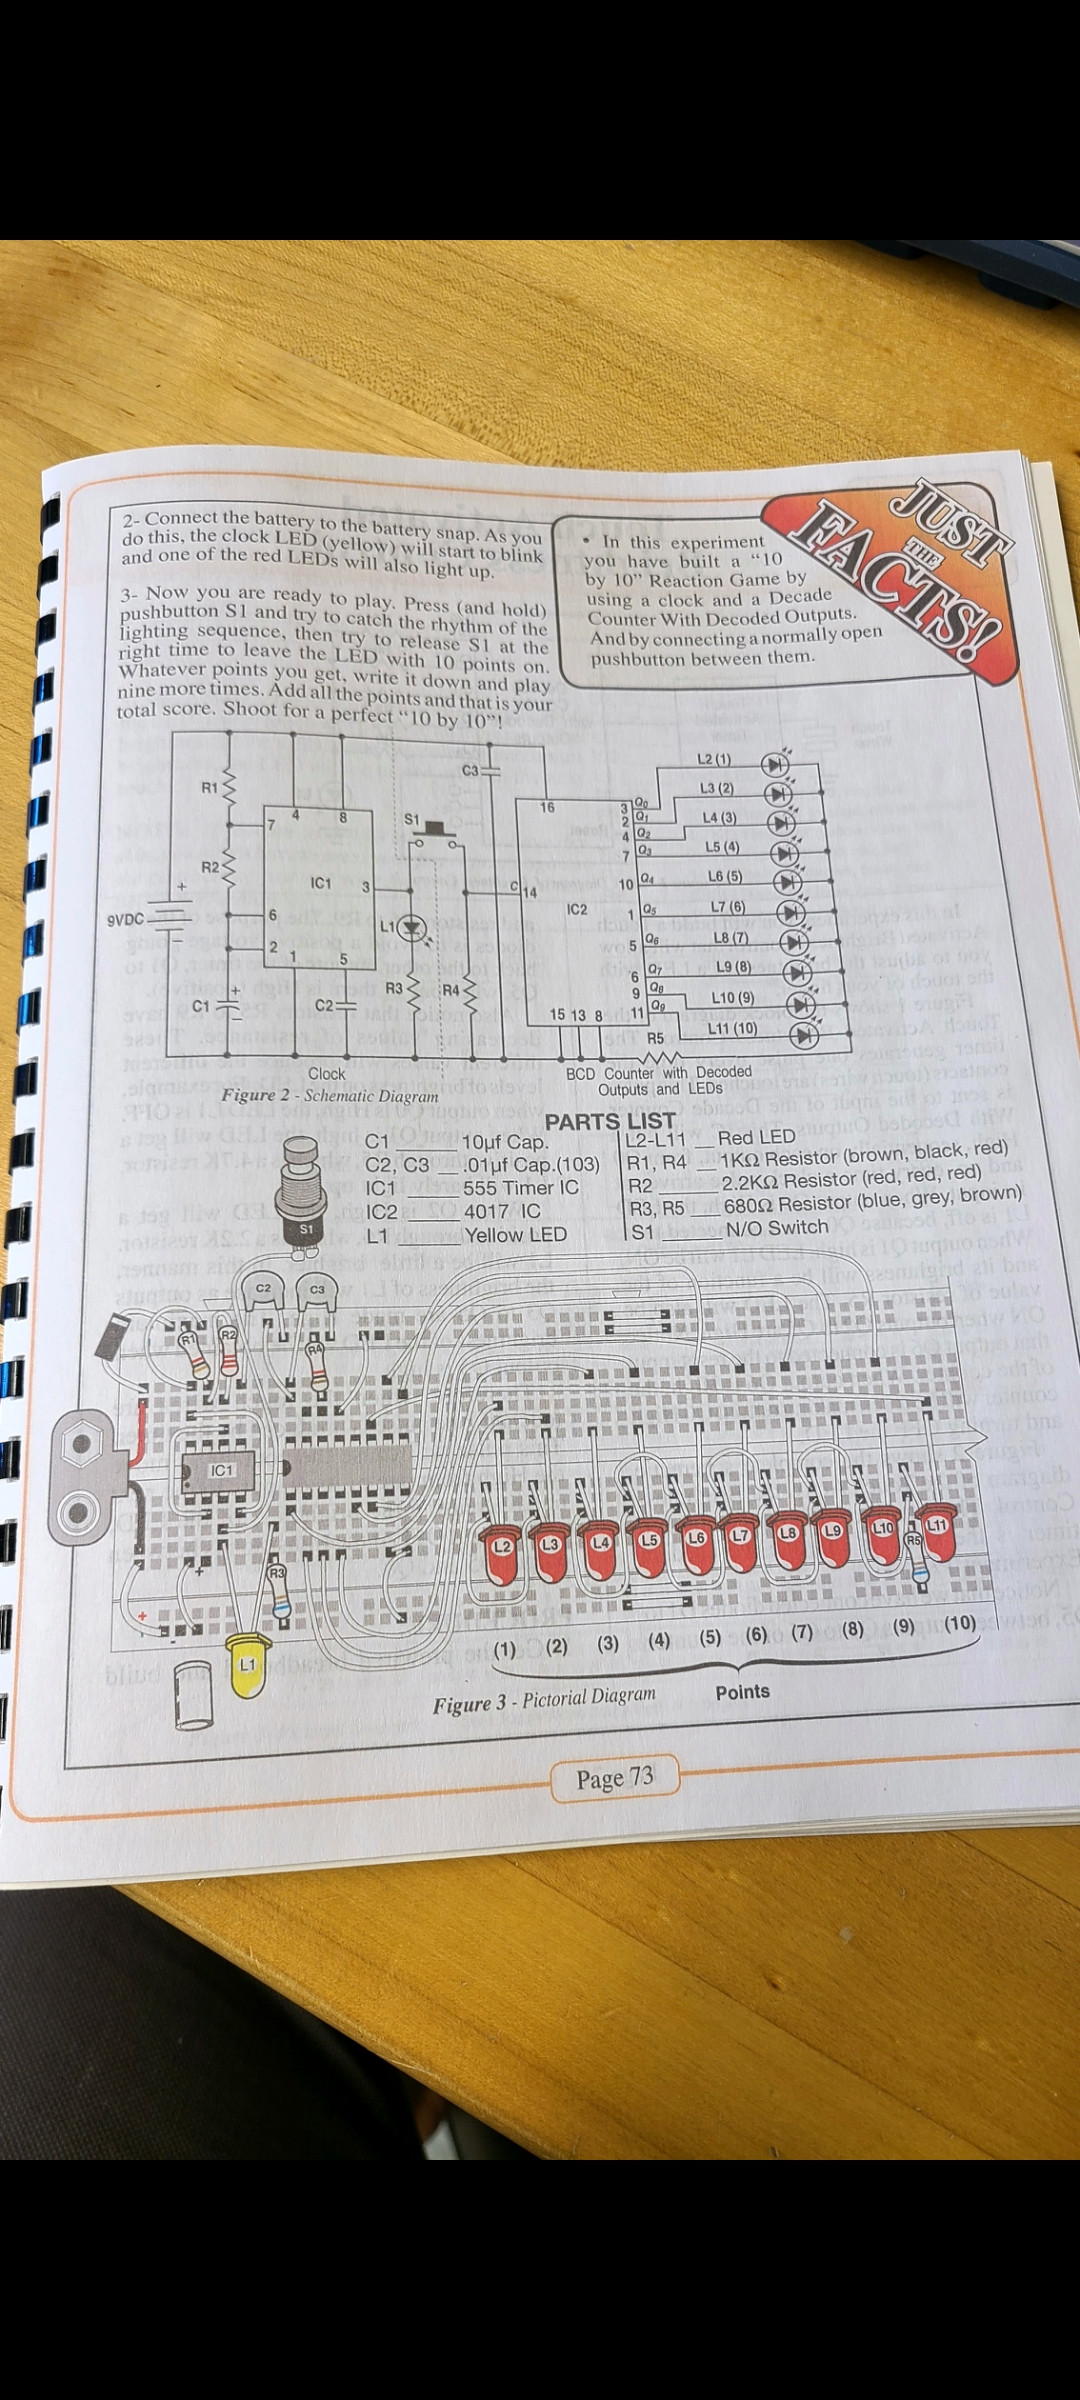
First, not all breadboards are the same. The one that you show is probably one of the most common ones today and they can be found everywhere. The "rails", positive and negative run the length of those rows so all of the little sockets are connected for each rail (shown in the top picture). The breadboard appearing in the workbook is an older style (bottom picture) and the rails are interrupted at one point and have to be bridged with a jumper wire and you see that in the diagram.
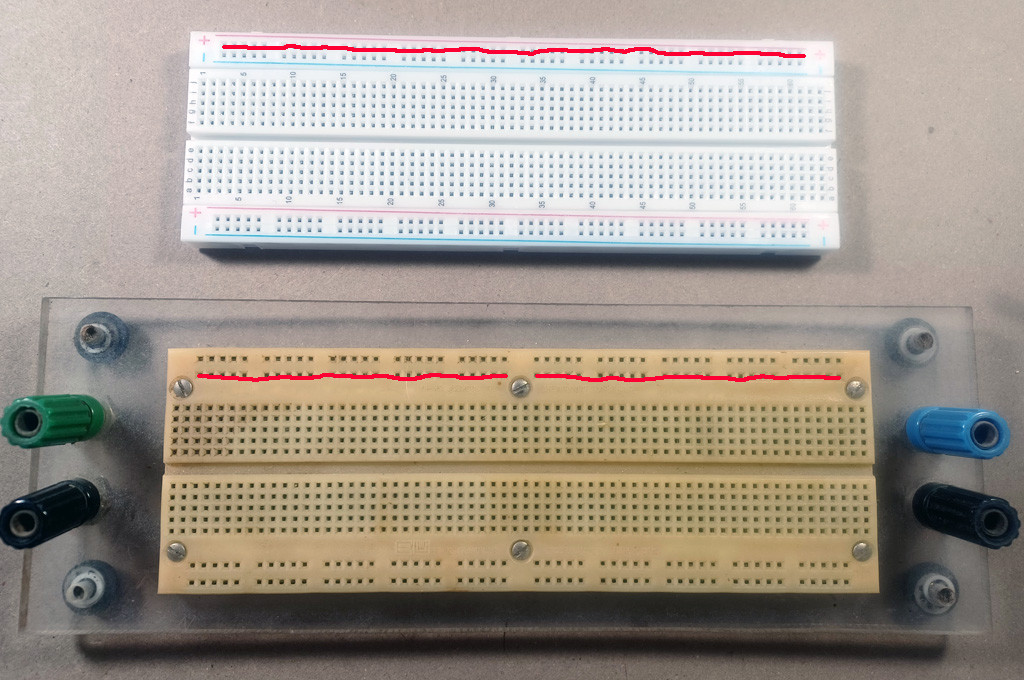
You don't need to add that jumper and you probably don't need to add three such jumpers shown below from your picture. BUT, get a meter and check how your breadboard is laid out - that way you don't have to guess.
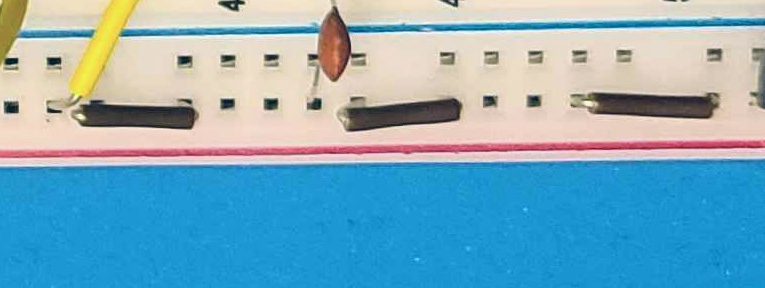
Second, look carefully at these resistors. Some of the leads look like they are touching and that will cause you some problems. Either trim the leads or make sure they don't touch each other.
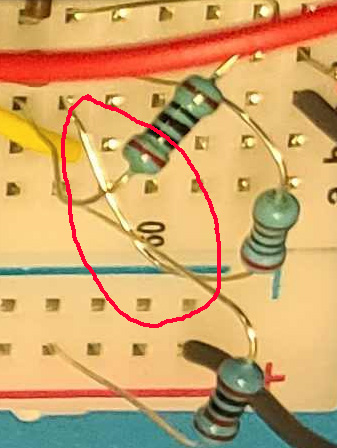
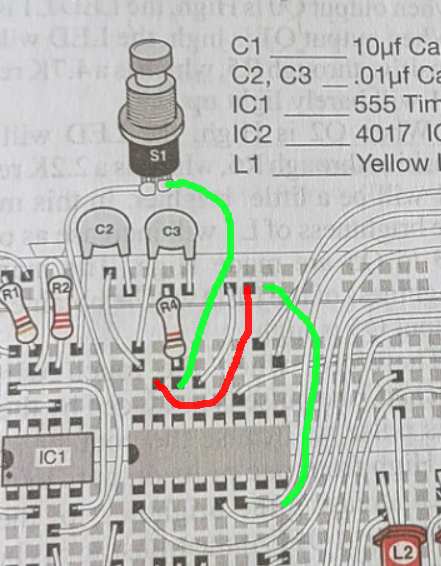
Next look at C1 in the schematic.
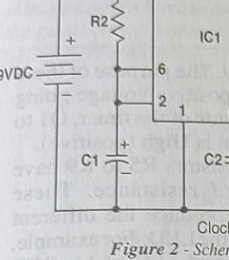
Now look at your board - see the difference? You have the + and - leads connected together and that is going to be a problem.
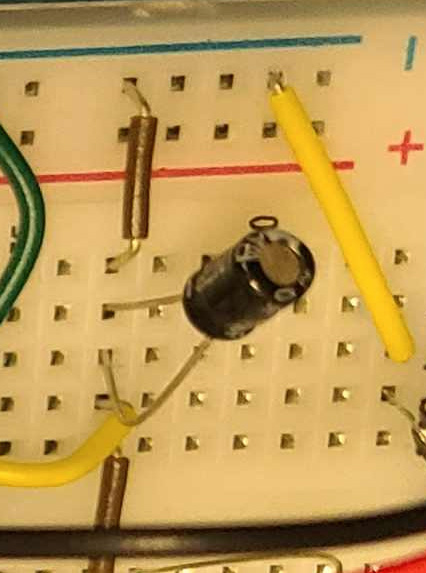
To make matters even more confusing, in the manual's pictorial illustration, it looks like they left C1 unconnected and off to the side - that happens and it is extra tough when it does and you are just starting out.
You might not want to hear this, but I think the best thing is to rebuild the whole circuit and do it slowly and carefully AND keep asking questions.
One of the hardest of all the lessons I had to learn is to check everything before applying power. Believe me, we ALL learn that lesson and I hope that you will keep at it because when you finally see the circuit working, it feels great!

